
 This is what your screen should look like. Don't worry if it is white. It won't matter. I'm using transparent.
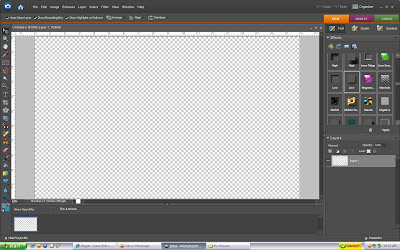 Now we add the papers. Go up to File-->Place. Then browse for the background paper of your choosing. Once selected, click "commit".
 Now, drag the paper around so that it's at the edge of the background. Once in place, go over to the layers palette. Right click-->Duplicate Layer.
 Once you have it duplicated, drag and place it on the right hand side. It should look like the picture below.
 *Note: If you are using a patterned paper, and they don't fit right when next to each other, don't worry. We will be putting another paper on top of it so it will hide any imperfection.
Now, go to the layers palette again, Right Click-->Merge Visible. This will merge the two papers together.
*Note: If you are using a patterned paper, and they don't fit right when next to each other, don't worry. We will be putting another paper on top of it so it will hide any imperfection.
Now, go to the layers palette again, Right Click-->Merge Visible. This will merge the two papers together.
 Now we are going to add the middle paper where your blog posts will go. Try to choose a solid paper or one with very little pattern. Go to File-->Open and browse for the paper you want. Once you find it, select it, and it will show up in a new file within photoshop.
 Here is the new file. Your paper should look similar to this. So, now we need to double click at the bottom where you see your other background file. So in the picture below, you will see what I mean. Make sure you bring that file back up.
 Once it's brough back into view, we will need to place the other file on top. We can do this by dragging and dropping it onto the file in view.
 Once you have drag/dropped, it should look similar to this. You can see in the picture I have highlighted the corners you can use to make it larger so you can place it inbetween 5 and 13.
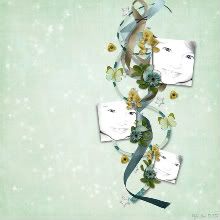
 This is what it should look like when it's done.
 Now, we can add elements to the sides if you like. I'm going to be using simple flowers. Go to File-->Place. Browse for whatever element you want.
 Once you have selected your element, resize it just like you did with the "green paper" and place it next to the 6 marker on the ruler to the side. This will be the middle of your paper to enusre it's seen.
 To make things pop a little bit more, you can add a drop shadow.
 Once you have completed your blog background, you must save it as a JPEG! So go to File--> Save as-->JPEG. Click Save.
 You are done with the blog background!!! Give yourself a pat on the back! Now all we have to do is put it on your blog. To do this, we need to upload our image to Photobucket. So, log in to photobucket. Before you browse to choose your file, make sure you change the size to 1MB
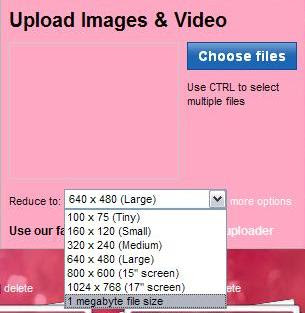 Now here comes the somewhat tricky part! Don't worry, I'll try to make it simple. Log into Blogger. We need to change your blog template to Minima if it is not already set to that. SO, go to Layout-->Pick New Template. Select the "Minima" template.
We have to edit our HTML. To do this go to Layout-->Edit HTML. Once there, you will see a box with a whole bunch of codes that will probably scare you. But, don't be afraid! LOL It's easy! In that box, scroll down to where you see this code:
body {
background:$bgcolor;
margin:0; color:$textcolor; font:x-small Georgia Serif; font-size/* */:/**/small; font-size: /**/small; text-
align: center;
Delete that part and replace it with this:
body {
background:$bgcolor;background-image:url(direct link);background-position: center; background-repeat:no-
repeat; background-attachment: fixed;
margin:0; color:$textcolor; font:x-small Georgia Serif; font-size/* */:/**/small; font-size: /**/small; text-
align: center;
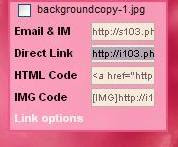
Now, take the direct link from Photobucket, and enter it in the parentheses in the above code where it says direct link. Once you have entered the code into the parentheses, you should be finished!!
To make sure things look right, you can click the preview button and it will show you what your blog will look like. If the preview looks good, go ahead and save it! You now have your very own custom made blog background!
I hope this was easy enough for you to understand. Like I said at the beginning, if you have any questions, please leave them here for me. I will try to get back to you ASAP!
Love,
Laura


8 comments:
Hi! I love how you made this tutorial for us...i have always wanted to learn how to digital design/scrapbook with photoshop and i just cant get it...i tried to follow yours but I do not have the same photoshop...i have adobe photoshop CS3...is that a bad one...do you know how to work that one...if so could you possibly tell me how make a blog using that one? thanks for any help you can give me!
Sweet I always wondered how to do that...Thank you for taking the time!! Now for me to find the time to try it, lol...
Thanks for sharing this wonderful tutorial, it is so easy to follow.
I have tried it and now my blog looks great with my own custom designed background.
Thank you very much!
do you loose all your current items on your blog??
THANK YOU THANK YOU for you awesome tutorial!! It was SO much easier than the other 8,000 I looked at and tried to follow tonight! And it worked! You're great!
Your tutorial is sooo easy to follow; I have PSe7. I just need to adjust my dimensions a bit...the resolution between IE8 and Fire Fox are different.
Would you mind giving a tutorial about making a header for Blogger too?
Thanks so much.
kshirley
I don't mean to bother you but...my background looks fine from IE8...but it looks like it repeats from FireFox. I have tried several different dimensions and still cannot get it to look right.
Is my code correct?
body {
background:$bgcolor;background-image:url(http://i73.photobucket.com/albums/i211/stillwaters_2006/Kshirley/purpleleaf.jpg);background-position: center;background-repeat:no-
repeat;background-attachment: fixed;
margin:0;
color:$textcolor;
font:x-small Georgia Serif;
font-size/* */:/**/small;
font-size: /**/small;
text-align: center;
}
Kshirley
Oh dear, it is me again...just wanted to let you know I solved my problem...yeah!
Post a Comment